3PL Mispick Prevention: Best Process Checks

Most 3PL mispicks start before packing. If I want to cut wrong SKUs, wrong variants, wrong quantities, missed lines, and wrong-bin pulls, I need tight checks at receiving, putaway, picking, packing, shipping, and error review.
Here’s the short version:
- Receiving: match PO/ASN data, scan every SKU, verify counts, and quarantine any label, barcode, count, or damage issue
- Putaway: scan item and bin, block manual location entry, and keep look-alike SKUs apart
- Picking: force scan order ID, location, item, and quantity in that order
- Packing: scan items into the carton, review look-alike products, and use carton weight checks for high-risk orders
- Shipping: match labels, manifests, carrier details, and loading scans before release
- Review: log each mispick with cause data, then review trends by SKU, zone, shift, and location
A few numbers stand out. One labeling project cut location scan failures from 31% to 0.3% and improved location accuracy from 91.2% to 99.4%. The article also points to simple control limits like ±1 unit or ±1% at receiving, plus quarantine SLAs such as 24 hours for label fixes and 48 hours for damage review.
Bottom line: I don’t stop mispicks with one final check. I stop them by forcing the right scan, match, and hold step at every handoff.
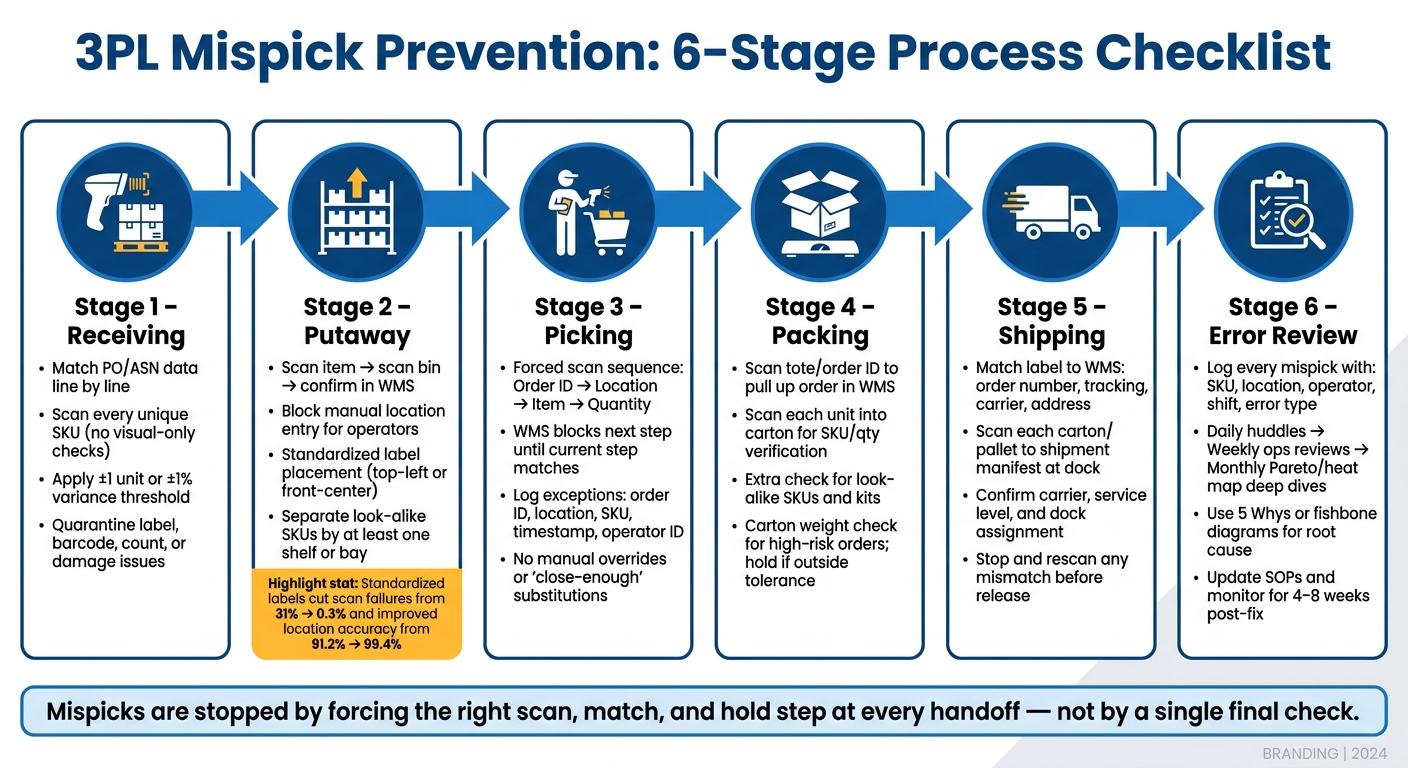
3PL Mispick Prevention: 6-Stage Process Checklist
How to Pick and Ship Orders in a 3PL Warehouse | Step-By-Step Outbound Process Explained
sbb-itb-eafa320
Receiving Checks for SKU Labels and Inbound Accuracy
Receiving mistakes don’t stay in receiving. They show up later as mispicks.
A bad label that slips through. A quantity issue that gets shrugged off. A barcode that scans to the wrong SKU. Each one plants the seed for a picking mistake down the line.
Verify Counts, SKUs, and Barcode Readability Before Accepting Stock
Before anything leaves the dock, the receiver should open the PO or ASN in the WMS and tie every count back to that record. Then check the shipment against what was expected - supplier, PO number, SKU, unit of measure, and quantity - line by line. Don’t receive the stock until every field matches.
Blind or semi-blind counts help cut bias. For high-risk SKUs, bring in a second verifier. Capture counts at the pallet, case, and unit level when needed, especially for high-value or high-risk items. It also helps to set a variance threshold, such as ±1 unit or ±1%, and flag anything outside that range for a recount before acceptance.
Every SKU on the shipment needs a barcode scan. Not some of them. Every unique SKU. A visual check alone isn’t enough. When the scanner reads the barcode, the WMS should show that the SKU description, unit of measure, and pack configuration match the physical product. If any part of that is off, treat it as an exception.
Look-alike SKUs need extra care at receiving. If items have near-identical packaging - same brand, similar size, small variant differences - tag them as "look-alike risk" in the WMS or receiving log as soon as they arrive. A side-by-side comparison of similar SKUs, paired with high-contrast human-readable labels that call out key differences like size or flavor, helps stop mix-ups before those items ever reach the pick zone.
Quarantine Items With Label, Count, or Damage Issues
Any unit that fails a receiving check should go straight to a designated quarantine location, not active stock. That includes missing labels, unscannable barcodes, quantity variances, visible damage, and ASN mismatches. Quarantine locations need to be set up as non-pickable and non-allocatable, so no order can pull from them by mistake.
Each quarantined unit should get a reason code at the moment it’s routed. Common codes include:
- label issue
- barcode unreadable
- count variance
- damage
- wrong item
- ASN mismatch
Those reason codes make root-cause analysis much easier later. Quarantine resolution should also have a clear owner, usually inventory control or a quality team, along with set SLAs: label issues resolved within 24 hours, and damage disposition within 48 hours.
Once the issue is fixed - whether that means relabeling, recounting, or supplier confirmation - the inventory can move from quarantine to active stock through a WMS transaction. Before release, require one more SKU and quantity double-check.
Once receiving is clean, putaway becomes the next control point.
Putaway and Picking Checks That Prevent Mis-Slotting and Wrong Picks
Receiving gets inventory clean. Putaway and picking decide whether it stays clean.
Use Scan-Confirmed Putaway and Strict Bin Location Standards
Keep putaway simple and strict: scan the item, scan the bin, then confirm the putaway in the WMS. Frontline staff shouldn't type locations by hand. Save manual entry for supervisors only. If operators can key in a bin, small typing mistakes can slip through and sit there quietly until a picker grabs the wrong item days later.
Every storage location needs a single, scannable barcode before anyone can use it. A zone-aisle-bay-shelf-bin format helps pickers do a quick visual check before they scan. Label placement should stay consistent too - top-left of the bin face or front-center of the shelf works well - so people always know where to look. That sounds minor, but it adds up fast on the floor.
Label quality matters just as much. Use high-contrast, durable labels that scan cleanly under normal warehouse wear. In one 3PL labeling project, standardizing label quality and placement cut location scan failures from 31% to 0.3% and improved location accuracy from 91.2% to 99.4%.
Similar-looking SKUs need physical distance, not just a note in the WMS. If two sizes or colors from the same product line come in near-identical packaging, don't place them in side-by-side bins. Split them by at least one shelf, a full bay, or even a different zone. The bin label should also spell out the key difference in large, easy-to-read text.
Once locations are locked down, picking needs the same scan discipline.
Require Location Scan, Item Scan, and Quantity Confirmation During Picking
Picking should follow one set sequence every time: scan the tote or order ID → scan the pick location barcode → scan the item barcode → confirm quantity. The WMS should force that sequence by blocking each step until the one before it is done and matched. If the location scan doesn't match the task, the picker stops there. If the item barcode doesn't match the SKU, the screen should reject it and ask for a re-scan.
When a picker finds an empty bin, a barcode that won't scan, or the wrong item in the slot, send the task to a standard exception screen. That screen should record:
- order ID
- location ID
- SKU
- timestamp
- operator ID
This matters because busy warehouses create pressure to “just keep moving.” But once pickers start swapping in a close-enough item or pulling from a different location without logging it, mispicks spread fast.
Review Slotting and Pick-Risk Patterns for High-Volume SKUs
Fast-moving SKUs belong in high-efficiency pick zones: waist-to-chest height, close to pack stations, with single-SKU locations and clear signs. Putting fast-movers in the same bin as slow-moving items creates clutter and makes the right pick harder than it should be.
If a fast-mover needs more than one location, set a primary pick face in the WMS. Then control replenishment to secondary locations on purpose, instead of letting inventory drift into any open space. That's where slotting starts to get messy.
High-volume pick-and-pack and kitting work needs tight location control for the same reason. One mis-slotted component can throw off several orders, not just one. Review mispick data every week by aisle, zone, SKU family, and pick method so you can spot error clusters early and deal with them before they spread.
Those same pattern checks should continue at pack-out, where a final check can catch what putaway and picking missed.
Packing and Shipping Checks Before an Order Leaves the Warehouse
Packing and shipping are the last shot to catch a missorted item, wrong label, or bad scan before an order heads out the door.
Confirm Order Contents at the Pack Station
At the pack station, scan the tote, cart, or order ID to pull up the order in the WMS. Then scan each unit or inner pack into the carton so the WMS can check the SKU, unit of measure, and quantity against the order line.
For look-alike SKUs, don’t just glance and move on. Check the on-screen description, size, color, or model before you pack it. If the order has multi-unit lines, use a final order summary screen before closing the carton.
For kits, bundles, and multi-carton orders, show the carton plan and scan the right components into each carton. That extra check helps stop mix-ups that are easy to miss when several items look close enough.
For complex multi-line orders, high-value items, or high-risk SKUs, add a carton weight check. The WMS should compare the actual scale weight with the expected weight profile and flag anything outside the tolerance band for review. If the weight check fails, hold the carton for a recheck before printing the label.
If there’s any carton mismatch, send it straight to exception logging before labeling.
Verify Shipping Labels, Manifests, and Loading Scans
Match the shipping label to the WMS record. Check the order number, carton ID, tracking number, ship-to name and address, carrier, and service level. The packing slip should match what’s actually in the carton and clearly show any backordered or substituted items.
At the dock, scan each carton or pallet to the shipment manifest before it leaves. Confirm that the load belongs to the right order, carrier, service level, and dock or trailer assignment.
If there’s a mismatch, stop the load right away. Rescan the carton and verify the WMS/TMS record. Inventory control should step in if the mismatch points to an upstream picking or slotting issue.
Log every blocked shipment with a reason code so the team can review what happened later.
Exception Handling, Team Review, and Continuous Improvement
Catching a mispick is only the first step. After that, you need to figure out why it happened and fix the source.
Log Every Mispick With Enough Detail to Find the Cause
When an error is caught, record it before the carton or shipment is closed out. Each incident record should include:
- Order ID
- SKU(s)
- Original pick location
- Actual location used
- Operator ID
- Shift
- Where the error was caught
You should also log the cost of fixing it, including labor, reship freight, and credits. That gives leadership a clear way to rank fixes by business impact, not just by how often the error shows up.
Each mispick should have one primary error type:
- Wrong item
- Wrong quantity
- Missed item
- Wrong location
- Labeling/barcode issue
- Documentation/manifest error
If needed, add secondary tags. Clear definitions matter here. They keep reporting steady across shifts and make trend data easier to trust.
Use one RF or tablet form that takes less than 60 seconds to complete. Dropdowns for error type, location, and SKU help keep it fast, and a short free-text field gives the operator space to note what happened. If you tie the form to current scan steps, it becomes part of normal work instead of one more task people try to dodge.
Then use those records to sort repeat errors by SKU, location, and shift.
Run Recurring Reviews and Update SOPs Based on Error Patterns
Use three review cadences.
Daily shift huddles should cover the prior day’s mispick counts by zone, along with any high-impact errors like expedited reships. Weekly reviews should bring together operations leadership, quality, and a rotating frontline representative. In those meetings, review mispick rates per 1,000 order lines and assign an owner and due date to every open corrective action. Those actions should tie back to scan history, bin locations, and exception reason codes from receiving through shipping. Monthly deep dives should use Pareto charts and bin-location heat maps to guide bigger changes in slotting, WMS setup, or training content.
When the same error keeps showing up, stop just logging it and start a root-cause review. The 5 Whys method works well for this. Start with the error you can see, then ask “why” until you get to a cause the team can control.
A scanner that frequently times out in a specific aisle because of poor Wi‑Fi coverage is a systemic fix, not a training conversation.
Fishbone diagrams can help too. They push the team to look across People, Process, Technology, Materials, and Environment, instead of grabbing the first answer that sounds right.
Once the root cause is confirmed, update the SOP with clear step-by-step instructions and a version date. Then roll it out in the next shift huddle, give a short training session, and watch mispick data for 4–8 weeks to make sure the fix is working.
Frontline staff should play an active role in this process, not just sit on the receiving end of it. Pickers and packers often notice friction first: confusing bin labels, cluttered racks, or look-alike packaging. Managers may not see those issues until they’ve already caused a string of errors. When team input leads to a visible SOP update or a drop in error rates, people start to see exception reporting for what it should be: a way to improve the operation, not a blame tool.
Conclusion: The Process Checks That Keep Mispicks From Repeating
Mispick prevention works like a chain of control points. It starts at receiving. If the wrong SKU label gets applied, or an unreadable barcode slips into available inventory, every step after that inherits the problem.
From there, scan discipline needs to stay firm through putaway, picking, packing, and shipping. No shortcuts. Tighter label and scan controls cut mispicks because they force accuracy at each handoff. That comes from process, not extra effort.
When a barcode won’t scan or a count doesn’t match, don’t force it through. Quarantine the exception and fix it before it goes back into active inventory. A structured workflow makes accuracy repeatable because the right action becomes the default at each step.
That same discipline has to stay in place after the immediate fix. The checklist should be treated as a permanent operating standard, not just something used in training. As volume grows, that’s what keeps accuracy steady. Review errors on a regular basis and update SOPs when the same patterns show up again. These checks only work when they’re enforced the same way across every SKU, handoff, and shipment.
FAQs
What causes most 3PL mispicks?
The biggest cause of 3PL mispicks is location accuracy.
If inventory isn’t sitting where the warehouse management system says it should be, pickers can easily grab the wrong item - or a SKU that looks almost the same.
Other common causes include:
- Manual picking without digital verification
- Look-alike products stored too close together
- Paper pick lists
- Inconsistent workflows
- Rushed processes that put speed ahead of accuracy
Which scan checks matter most?
The most important scan checks are the ones that enforce scan-to-verify at every handoff: bin, item, and quantity confirmation before any transaction can move forward.
Scan-to-pick and scan-to-pack are the strongest controls because they catch mistakes before items move downstream. Carrier scan proof at dock loading also helps protect order integrity until the shipment leaves the facility.
How should mispick exceptions be tracked?
Track mispick exceptions with standard error codes like shortages, damage, mismatches, and overages. For each record, log the exact count, add condition notes, and include photo proof when it applies.
Use your Warehouse Management System to record each event with reason codes and required supervisor approval. That gives you a clear audit trail. Supervisors should also monitor queue aging in real-time dashboards so they can spot patterns early and guide corrective training and process fixes.
Related Blog Posts
Related Articles
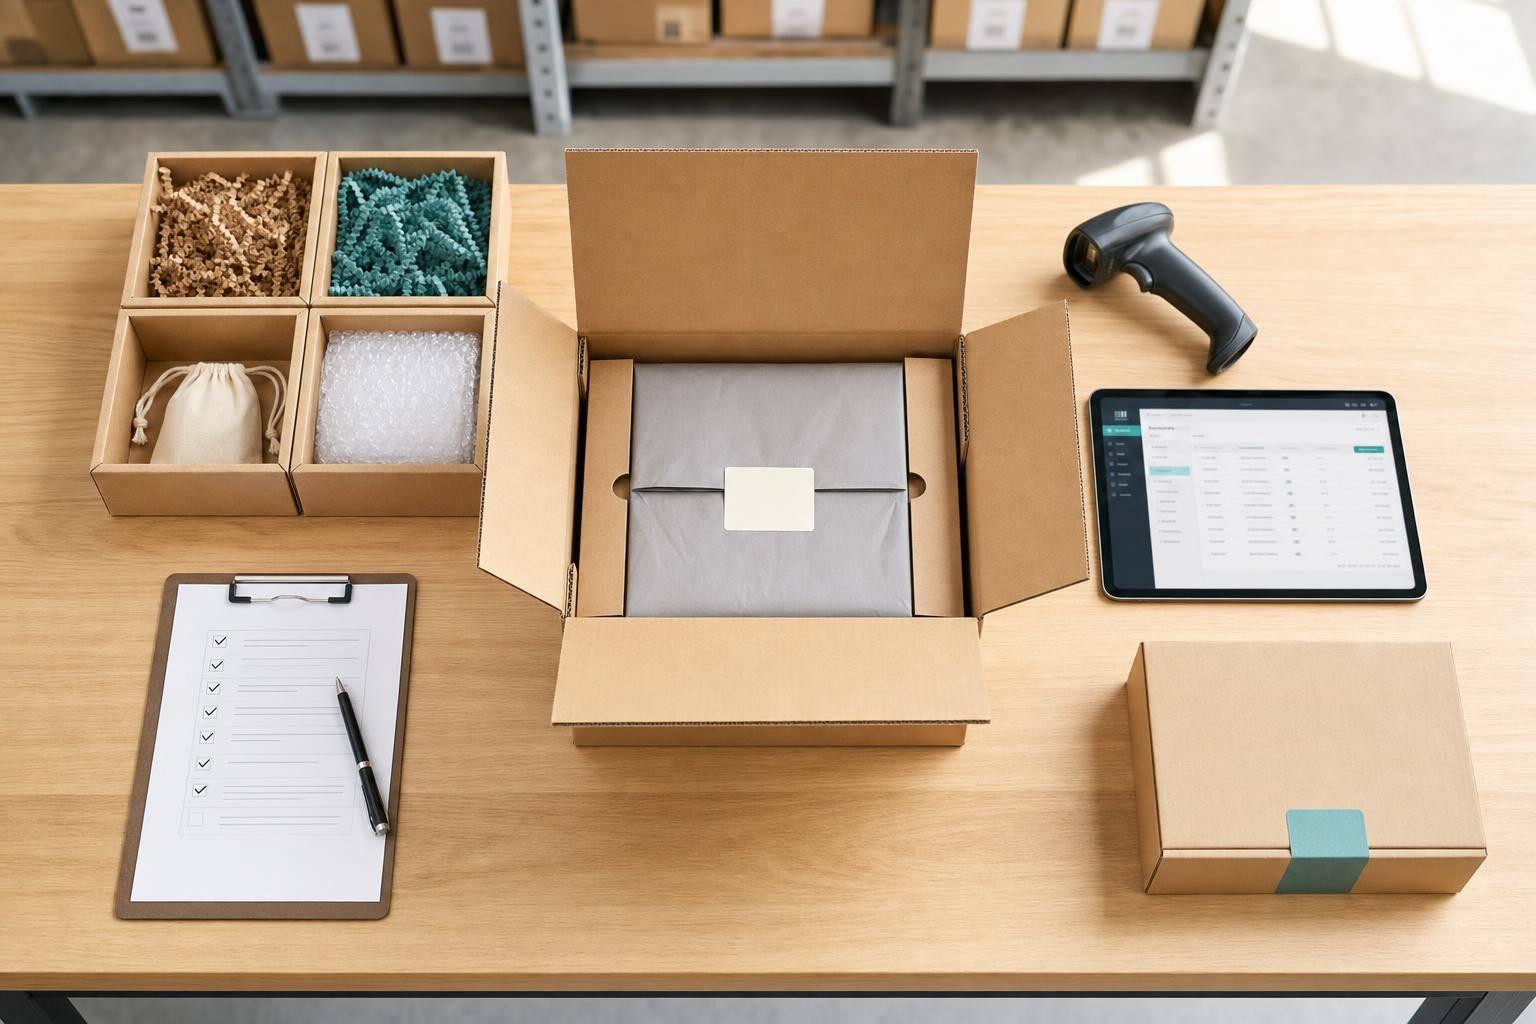
3PL Custom Packaging for E-commerce Orders
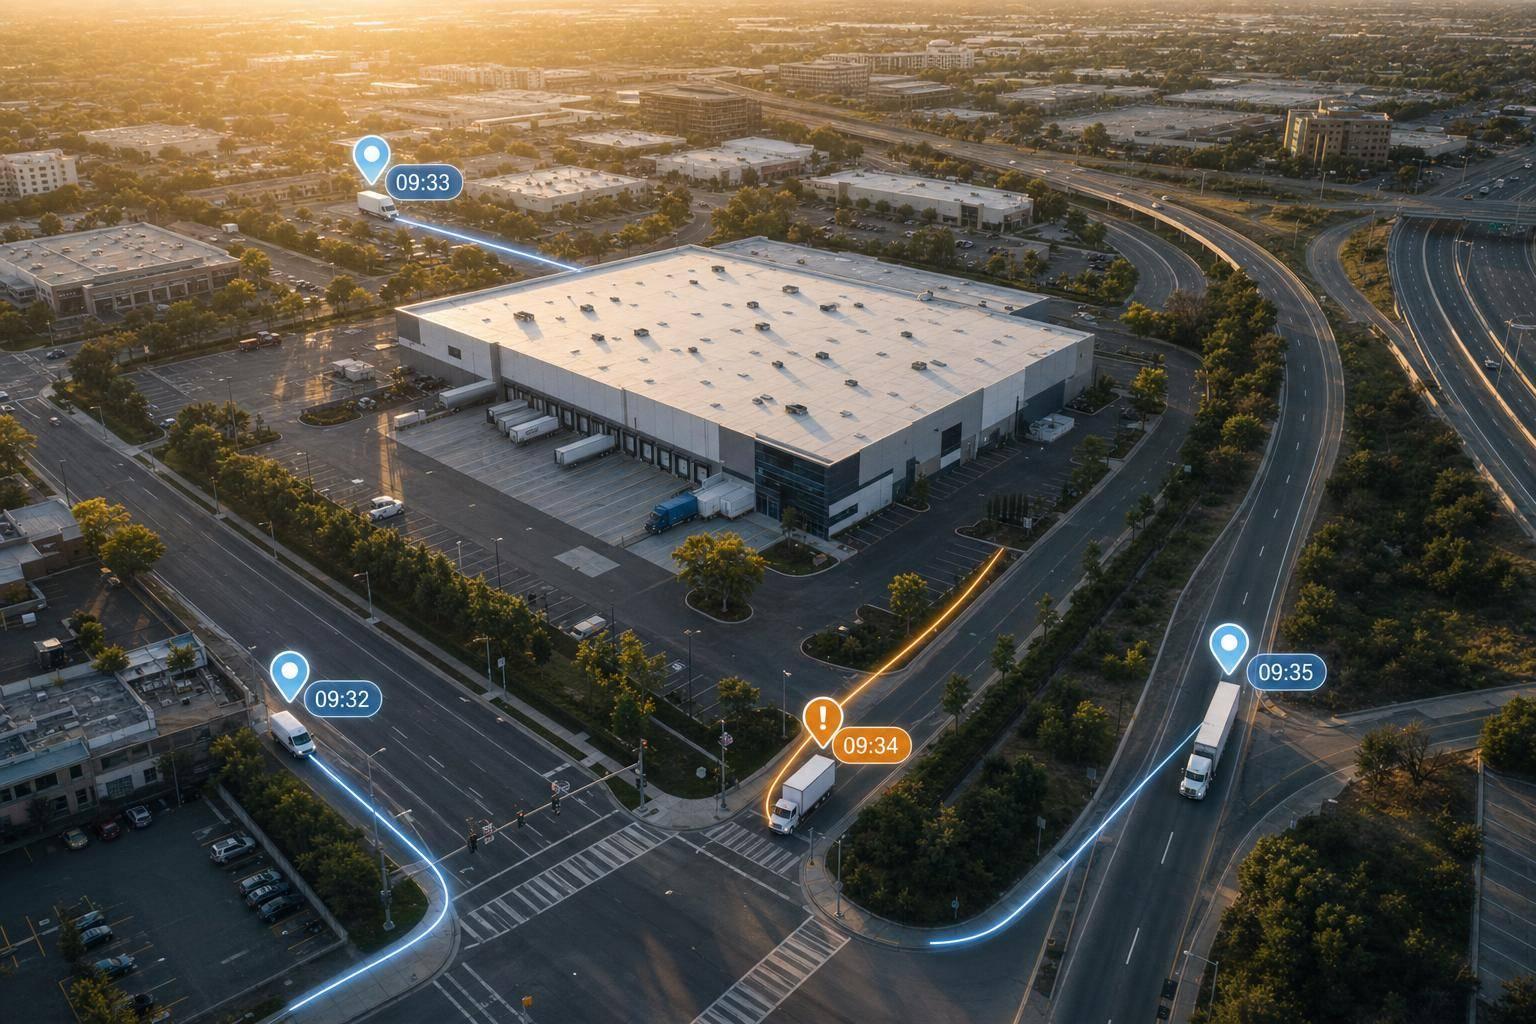
Real-Time Delivery Visibility for 3PL: Guide