Shopify 3PL Integration: Best Practices
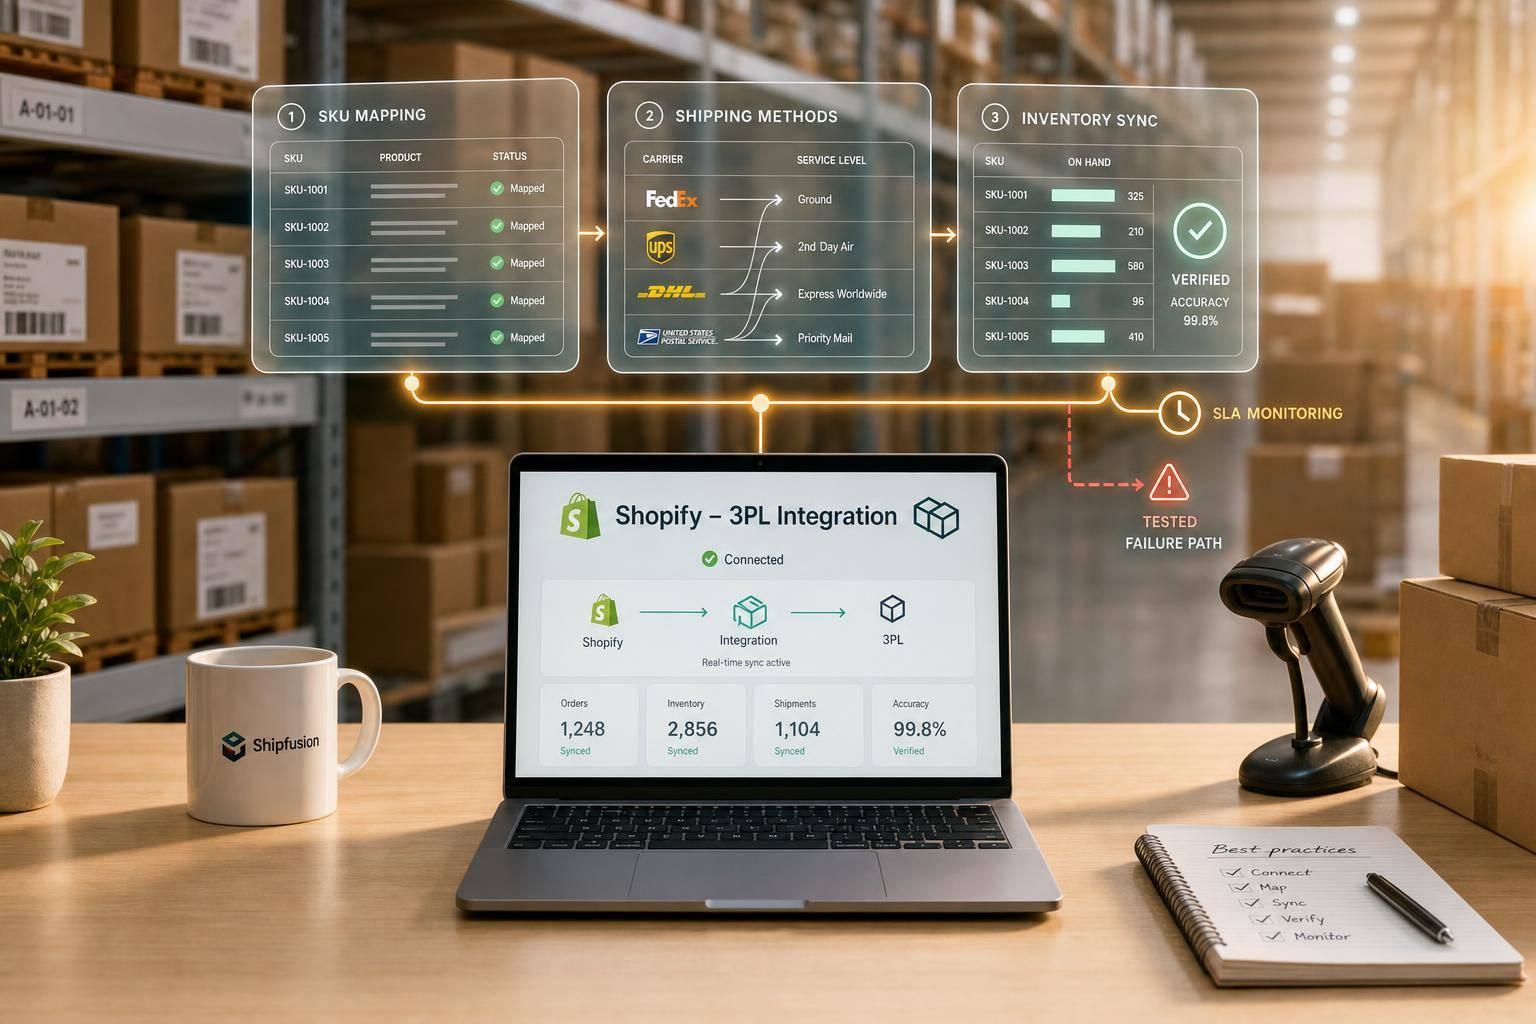
If your Shopify orders are piling up, the fix is simple: clean your data, map every field right, test failure cases, and watch a small set of live metrics. When order volume climbs, even small sync issues can turn into oversells, late shipments, and support tickets. The article’s core point is clear: good Shopify 3PL integration is less about turning on an app and more about getting SKU data, inventory rules, shipping mappings, and warehouse workflows lined up before go-live.
Here’s the short version of what I’d want you to know right away:
- Match SKUs exactly between Shopify and the 3PL’s WMS, down to caps, spaces, and hyphens.
- Map shipping methods correctly so checkout options match carrier service levels.
- Wait to sync sellable stock until the 3PL has received, checked, and counted inventory.
- Use webhooks and API rules carefully, with HMAC checks, async processing, and idempotency.
- Test more than happy-path orders: bundles, returns, label failures, stockouts, and late cancellations.
- Track a few hard numbers like order sync latency under 30 seconds, inventory variance within 0.5%, and oversells under 1% during peak periods.
- Set clear SLA and exception rules so warehouse, support, and returns teams handle issues the same way.
- Plan for multi-location routing before growth forces you into patchwork fixes.
A few numbers stand out. Misalignment between systems costs large firms an average of $12.9 million per year. Brands without tight sync can hit 2%–3% oversell rates in peak periods. And sending tracking updates in real time can cut “Where is my order?” tickets by up to 65%.
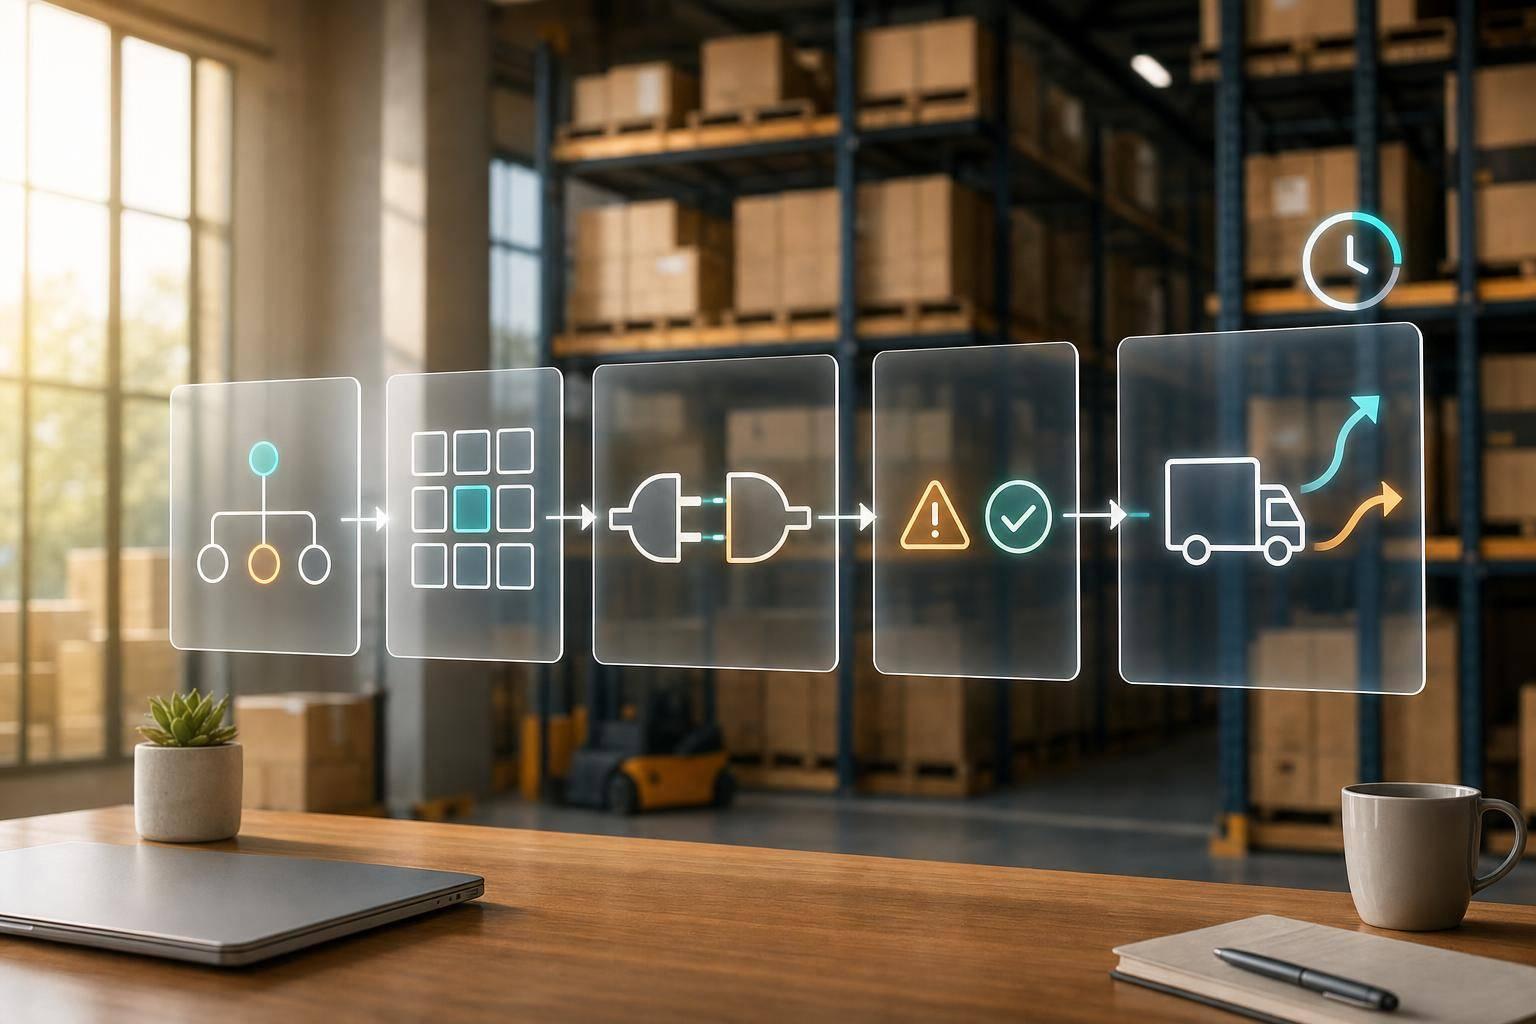
What I like about this piece is that it stays practical. It doesn’t just say “connect Shopify to your 3PL.” It shows that the work breaks into four parts: data cleanup, setup, testing, and control after launch. That’s the difference between a connection that works on paper and one that keeps working when volume spikes.
If I had to sum up the article in one line, it would be this: your integration works when orders, inventory, shipping, returns, and exceptions all follow the same rules in both systems.

Shopify 3PL Integration: Key Metrics & Best Practices at a Glance
How to Connect Shopify to Your ERP, 3PL, and Retailers - eZCom Lingo Explained

sbb-itb-eafa320
Prepare Your Shopify Store and Fulfillment Data Before Go-Live
Clean up product and inventory data before go-live. Shopify and your 3PL need to read the same fields the same way before orders can move without hiccups. Start with catalog data, then check shipping rules and inventory status.
Standardize SKUs, variants, bundles, and product attributes
SKUs are the main matching key between Shopify and the 3PL's WMS. If they don't match exactly - including capitalization, hyphens, and spacing - the WMS can't route the order to the right item. That might sound small, but it causes a lot of trouble fast. Mismatched field definitions between ecommerce platforms and warehouse systems account for 27% of order errors.
Give each variant its own SKU. Set up bundles before launch as either component picks or pre-kitted SKUs. It also helps to map custom metafields early so product data stays in sync across both systems. If an item needs special handling, spell that out in the data contract. That includes hazmat, gift messages, and similar rules.
Audit weights, dimensions, shipping profiles, and service levels
Check every product's weight and dimensions before go-live. This step matters more than many teams expect. Bad size or weight data can throw off rate shopping, packing logic, and carrier selection.
Then look at shipping methods in Shopify and compare them with the carriers and service levels your 3PL can ship. If checkout offers a service level the 3PL doesn't support, the order gets stuck. Update shipping zones so they match the 3PL's actual fulfillment nodes. Your promised delivery windows also need to line up with the 3PL's physical cut-off times.
Once shipping rules match, make sure inventory has been physically received before you switch on sync.
Confirm receiving workflows and inventory readiness
Don't turn on the integration until the 3PL has physically received, inspected, and counted your inventory in their WMS. Only post stock to Shopify after it's received, inspected, and sellable.
Before launch, ask for a formal Goods Received Confirmation (GRC) with SKU-level counts. Define what "available" means in plain terms inside your setup. Usually, that should mean sellable units only, kept separate from reserved, damaged, or returned-but-uncleared stock. Also check how often the WMS sends inventory updates to Shopify. For high-velocity SKUs, sync lag should stay under 5 minutes to help prevent overselling.
Next comes connection setup: API access, webhook rules, and field mapping.
How to Set Up the Shopify 3PL Integration
Once your data is clean and the warehouse has confirmed inventory, it’s time to build the connection between Shopify and the 3PL’s WMS. This is the point where things either run smoothly or pile up in error queues. After that, field mapping and testing are what determine whether the setup can handle live order volume without falling apart.
Configure API connections, webhooks, and sync rules
Most 3PL integrations connect to Shopify in one of two ways: a Public App that uses OAuth for self-serve onboarding, or a Custom App that uses an access token for managed setups.
After the connection is in place, register the 3PL as the fulfillment location with Shopify’s FulfillmentService API. That allows the WMS to receive orders and keeps inventory visible inside Shopify. If you need split shipments or partial fulfillments, build around the FulfillmentOrder object instead of the older Fulfillments REST endpoint.
Webhooks should handle order, cancellation, inventory, and routing events. The safe pattern is simple: return 200 OK right away, then process the payload asynchronously. Before you trust the payload, verify the HMAC signature against the raw request body. Shopify retries failed webhooks for up to 48 hours.
For inventory and order changes, use delta updates instead of “set-to” writes. That helps avoid race conditions when volume spikes.
Map order, address, inventory, and handling fields
Field mapping is where a lot of integrations fail quietly. Nothing looks broken at first, but orders start drifting off course.
The main mappings usually include:
- Shopify Variant ID → WMS Item ID
- Shipping Title → Carrier Service Code
- Order Tags → Special Handling Flags
- Customer Note → Packing Slip Note
- Metafields → Bundle Components
Use Shopify’s GraphQL global Variant ID as the main key, not just the SKU string. A SKU can be renamed. The Variant ID stays stable, which helps prevent silent failures later.
Address mapping also needs close attention, especially for U.S. shipping addresses and ZIP codes. If the WMS sends an address the carrier system can’t validate, label generation will fail. And when labels fail, the whole workflow tends to jam up behind them.
Run pre-launch testing across real order scenarios
Before go-live, test the setup across mapping, sequencing, and recovery flows. Mapping validation checks that shipping methods and tags line up between systems. Sequencing validation makes sure inventory is reserved before picking starts and that shipment confirmations write back the way they should. Recovery validation shows what happens when a label fails, inventory runs short, or a carrier rejects a shipment.
Don’t stop at the basic single-item order. Run tests for multi-item orders, bundles, expedited shipping, and full return cycles. That includes label generation, inspection, restock, and refund triggers.
Also test cancellations that come in after a pick ticket has already been released. You want to confirm the system can handle the intercept-or-ship pattern cleanly. It’s also smart to slow down your webhook endpoint on purpose and see what happens. That gives you a way to confirm Shopify’s retry behavior doesn’t create duplicate records in the WMS.
Use shopify_order_id as a unique constraint in the WMS to enforce idempotency. Once these tests pass cleanly, the next focus is SLAs, visibility, and exception handling.
Run the Integration With Clear SLAs, Visibility, and Controls
After testing passes, live controls are what keep the integration steady when order volume climbs.
Set cut-off times, fulfillment SLAs, and exception handling rules
Once the integration is live, order cut-off times and exception rules decide whether fulfillment stays under control or starts to drift. Set a noon cut-off for same-day shipping. Orders received before 12:00 PM should be processed the same day.
Then map out the workflows for the issues that disrupt fulfillment most often: address validation failures, inventory shortages or short-picks, SKU mismatches, carrier rejections, and order holds. Also, lock edits after picking starts so system records stay aligned with what’s happening on the warehouse floor.
Track the metrics that show integration health
You don’t need a huge dashboard. A small set of live metrics, checked weekly, can tell you a lot:
- Order sync latency from Shopify to the WMS: under 30 seconds
- Fulfillment accuracy: 99%+
- Inventory accuracy versus physical count: within 0.5% variance
- On-time shipment rate: in line with the agreed SLA
- Tracking number upload speed: within the same day
- Oversells during peak periods: under 1%
Watch inventory variance closely. Small drift can turn into oversells fast during peak periods. To keep that from snowballing, use real-time deductions, hourly deltas, nightly reconciliation, and weekly cycle counts. During daily reconciliation, use the WMS as the source of truth.
Set alerts for failed webhook deliveries, dead-letter queue entries, and any inventory sync delay that goes past your threshold.
When these numbers slip, the problem is often one rule, one field, or one workflow, not the entire integration.
Align returns, support, and multi-location inventory rules
Operational control has to cover returns too, not just outbound orders. Returns should move through receiving, QC, restock, and then a Shopify inventory update. Refunds should trigger only after the 3PL's QC system marks the item as approved, then refund the order. Real-time updates also help support teams avoid working from stale order and return data.
For brands running more than one fulfillment location across the U.S., routing logic should account for customer proximity, stock by location, and warehouse capacity. Multiple U.S. warehouses can cut shipping costs by 18% to 20%. Build those routing rules into the integration so each order follows the same path.
With live controls in place, the next step is choosing a 3PL that can absorb growth without changing the operating model.
Scale With the Right 3PL Partner and Long-Term Optimization
Add capacity without breaking order flow
Once SLAs and exception handling are stable, capacity becomes the next bottleneck. In most cases, growth snaps workflows before it fills warehouse shelves. That’s why it makes sense to scale only when routing, inventory sync, and exception handling can handle more volume without manual work.
One of the best ways to do that is multi-node fulfillment. Shifting from one warehouse to East Coast, West Coast, and Central U.S. nodes can place inventory within 2–3-day ground shipping reach of 95% of U.S. addresses. At higher volume, an OMS or iPaaS helps manage zone-based and cost-based routing. And the savings can add up fast: optimized routing at 500 orders per day can cut $2,000 to $5,000 per month in avoidable shipping costs.
Before you flip the switch on a new node, test it with 50–100 real orders. That small trial can save a lot of cleanup later. Your 3PL should also be able to add nodes without rebuilding current workflows or creating manual exceptions.
Use value-added services for more complex fulfillment workflows
Scale isn’t just about handling more orders. It’s also about handling messier workflows.
As brands move past basic pick-and-pack, fulfillment needs tend to get more specific. That’s where value-added services (VAS) come in. Services like pick and pack, kitting and assembly, testing, and white-glove handling help brands outsource more complex fulfillment work without adding in-house headcount.
Conclusion: The core practices that make Shopify 3PL integration work
The right partner helps you grow without forcing a workflow reset every few months. Look for a 3PL with a WMS-backed operation, multi-node routing support, and the ability to manage more complex workflows, including returns, RMAs, and retail-compliant EDI, without making you rebuild your integration whenever volume climbs.
For brands that need custom 3PL infrastructure and nationwide U.S. coverage, JIT Transportation offers a scalable fulfillment network with the value-added services and technology integrations to support growing Shopify operations.
Shopify 3PL integration works at scale when data stays clean, automation stays steady, SLAs stay clear, and the 3PL can grow with you without redesigning the workflow. Review performance weekly, audit SLAs quarterly, and load-test before peak season.
FAQs
How long does Shopify 3PL integration usually take?
For a simple direct-to-consumer setup with a native Shopify app, integration is usually fast. In most cases, it takes about 2 to 4 hours from installation to launch.
Things change when the setup gets more involved. If you’re working with custom APIs or syncing data across multiple warehouses, ERP systems, and sales channels, the timeline gets much longer. There’s more planning, more configuration, and a lot more testing.
And it doesn’t stop at launch. These setups also need regular maintenance so they keep working with future platform updates.
What should I fix first if orders or inventory stop syncing?
First, check data governance and system connectivity. Make sure you know which system is the source of truth for stock levels, and confirm that SKUs line up across Shopify and your warehouse system.
Then look through webhook logs and API status for dropped events, failed transmissions, or rate-limit issues. Put idempotency and reconciliation jobs at the top of the list so you can catch and fix discrepancies left behind by the outage.
When do I need multi-location routing?
You’ll usually need multi-location routing once order volume climbs past 200 orders per day or when you start using multiple fulfillment centers to cut delivery times and lower shipping costs.
It matters even more when your customers are spread across different regions, delivery complaints start piling up, or you need automated order assignment based on real-time inventory and transit data.
Related Blog Posts
Related Articles

Harmonized Tariff Codes in ASEAN: Simplifying Trade
3PL Integration: Automating Order Processing Explained